You can add residents individually or import a whole building at once. Either way, each resident receives an email or SMS to set up their Veni app and start opening doors.
Invite a single resident
- Go to Buildings and open the building.
- Select the Residents tab, find the unit, then choose Invite resident.
- Enter the resident's name and email (or phone number), choose which doors they can open, and send.
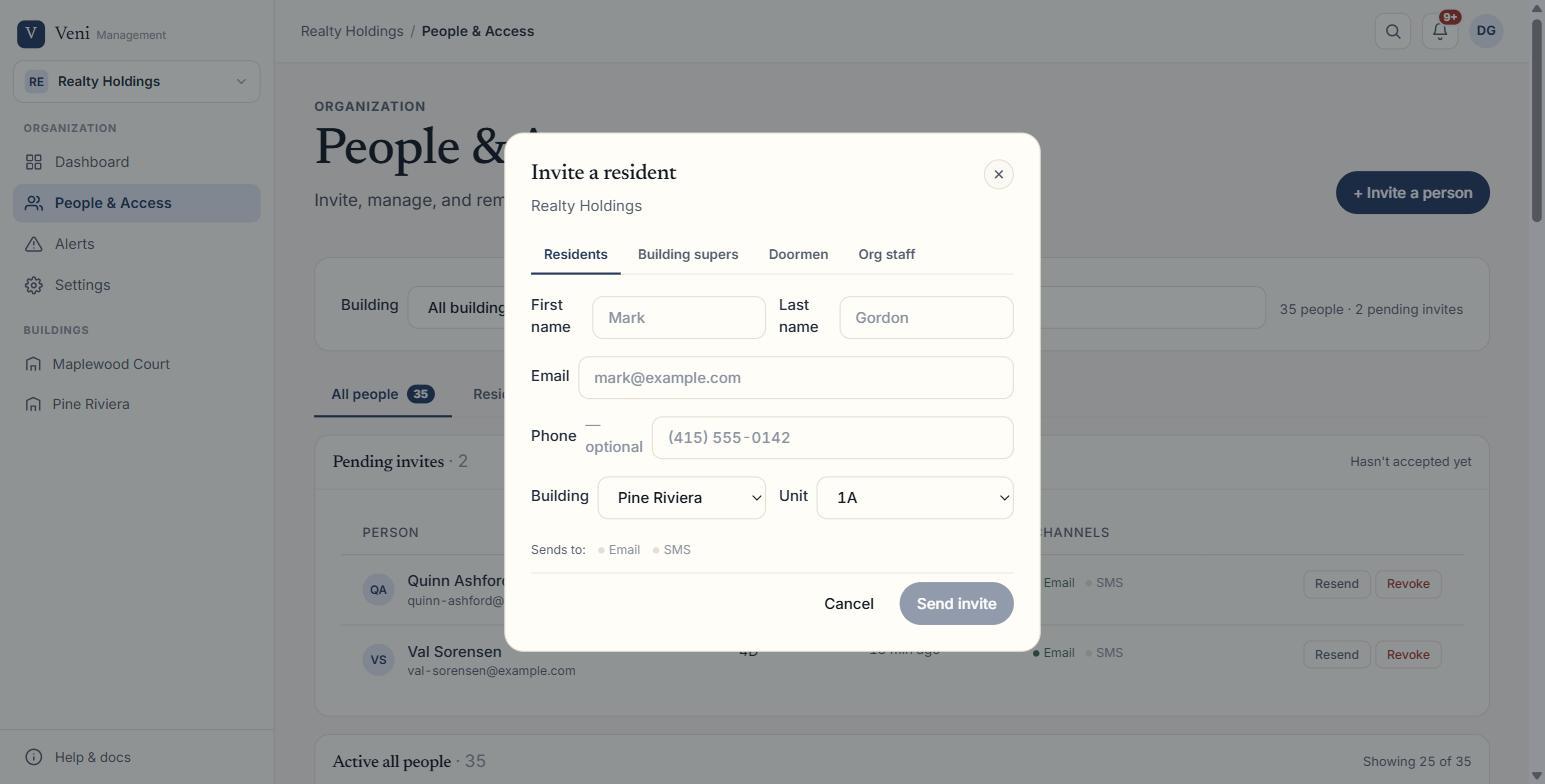 Inviting a single resident
The invite shows up under Pending until the resident accepts. You can resend or cancel it from that same view.
Bulk onboarding
For a new building or a large move-in, use Bulk Add Residents to process many residents in one pass. Open the building's Residents tab and choose Bulk Add Residents.
Step 1; Add data. Pick one or more input methods:
- Paste from spreadsheet: copy rows from Excel or Google Sheets and paste. Columns (Unit, First Name, Last Name, Email, Phone) are detected automatically.
- Upload CSV: attach a
.csvfile up to 5 MB. Download the template from the upload panel if you need the column format. - Photo of intercom or roster: photograph the buzzer panel or a printed unit list. Names are read automatically via vision: the photo is never stored on Veni's servers.
Step 2; Review and resolve. The review grid shows every detected row. Each row gets a status:
- New: will receive an email or SMS invite.
- Existing user: already on Veni; will be attached to the unit instantly.
- Needs fixing: no contact or invalid email (shown in red). Edit inline before sending.
- Skipped: already active or invite already pending; no action taken.
Edit any name or contact field directly in the grid. A "+ new unit" badge appears next to units that don't exist yet in the building; they are created automatically on send.
Step 3; Send invites. The commit bar at the bottom shows a live tally. Click Send invites to dispatch everything in one batch.
After sending, the result screen shows how many invites went out, how many existing users were attached, how many new units were created, and any rows that failed. Failed rows remain in the importer to fix.
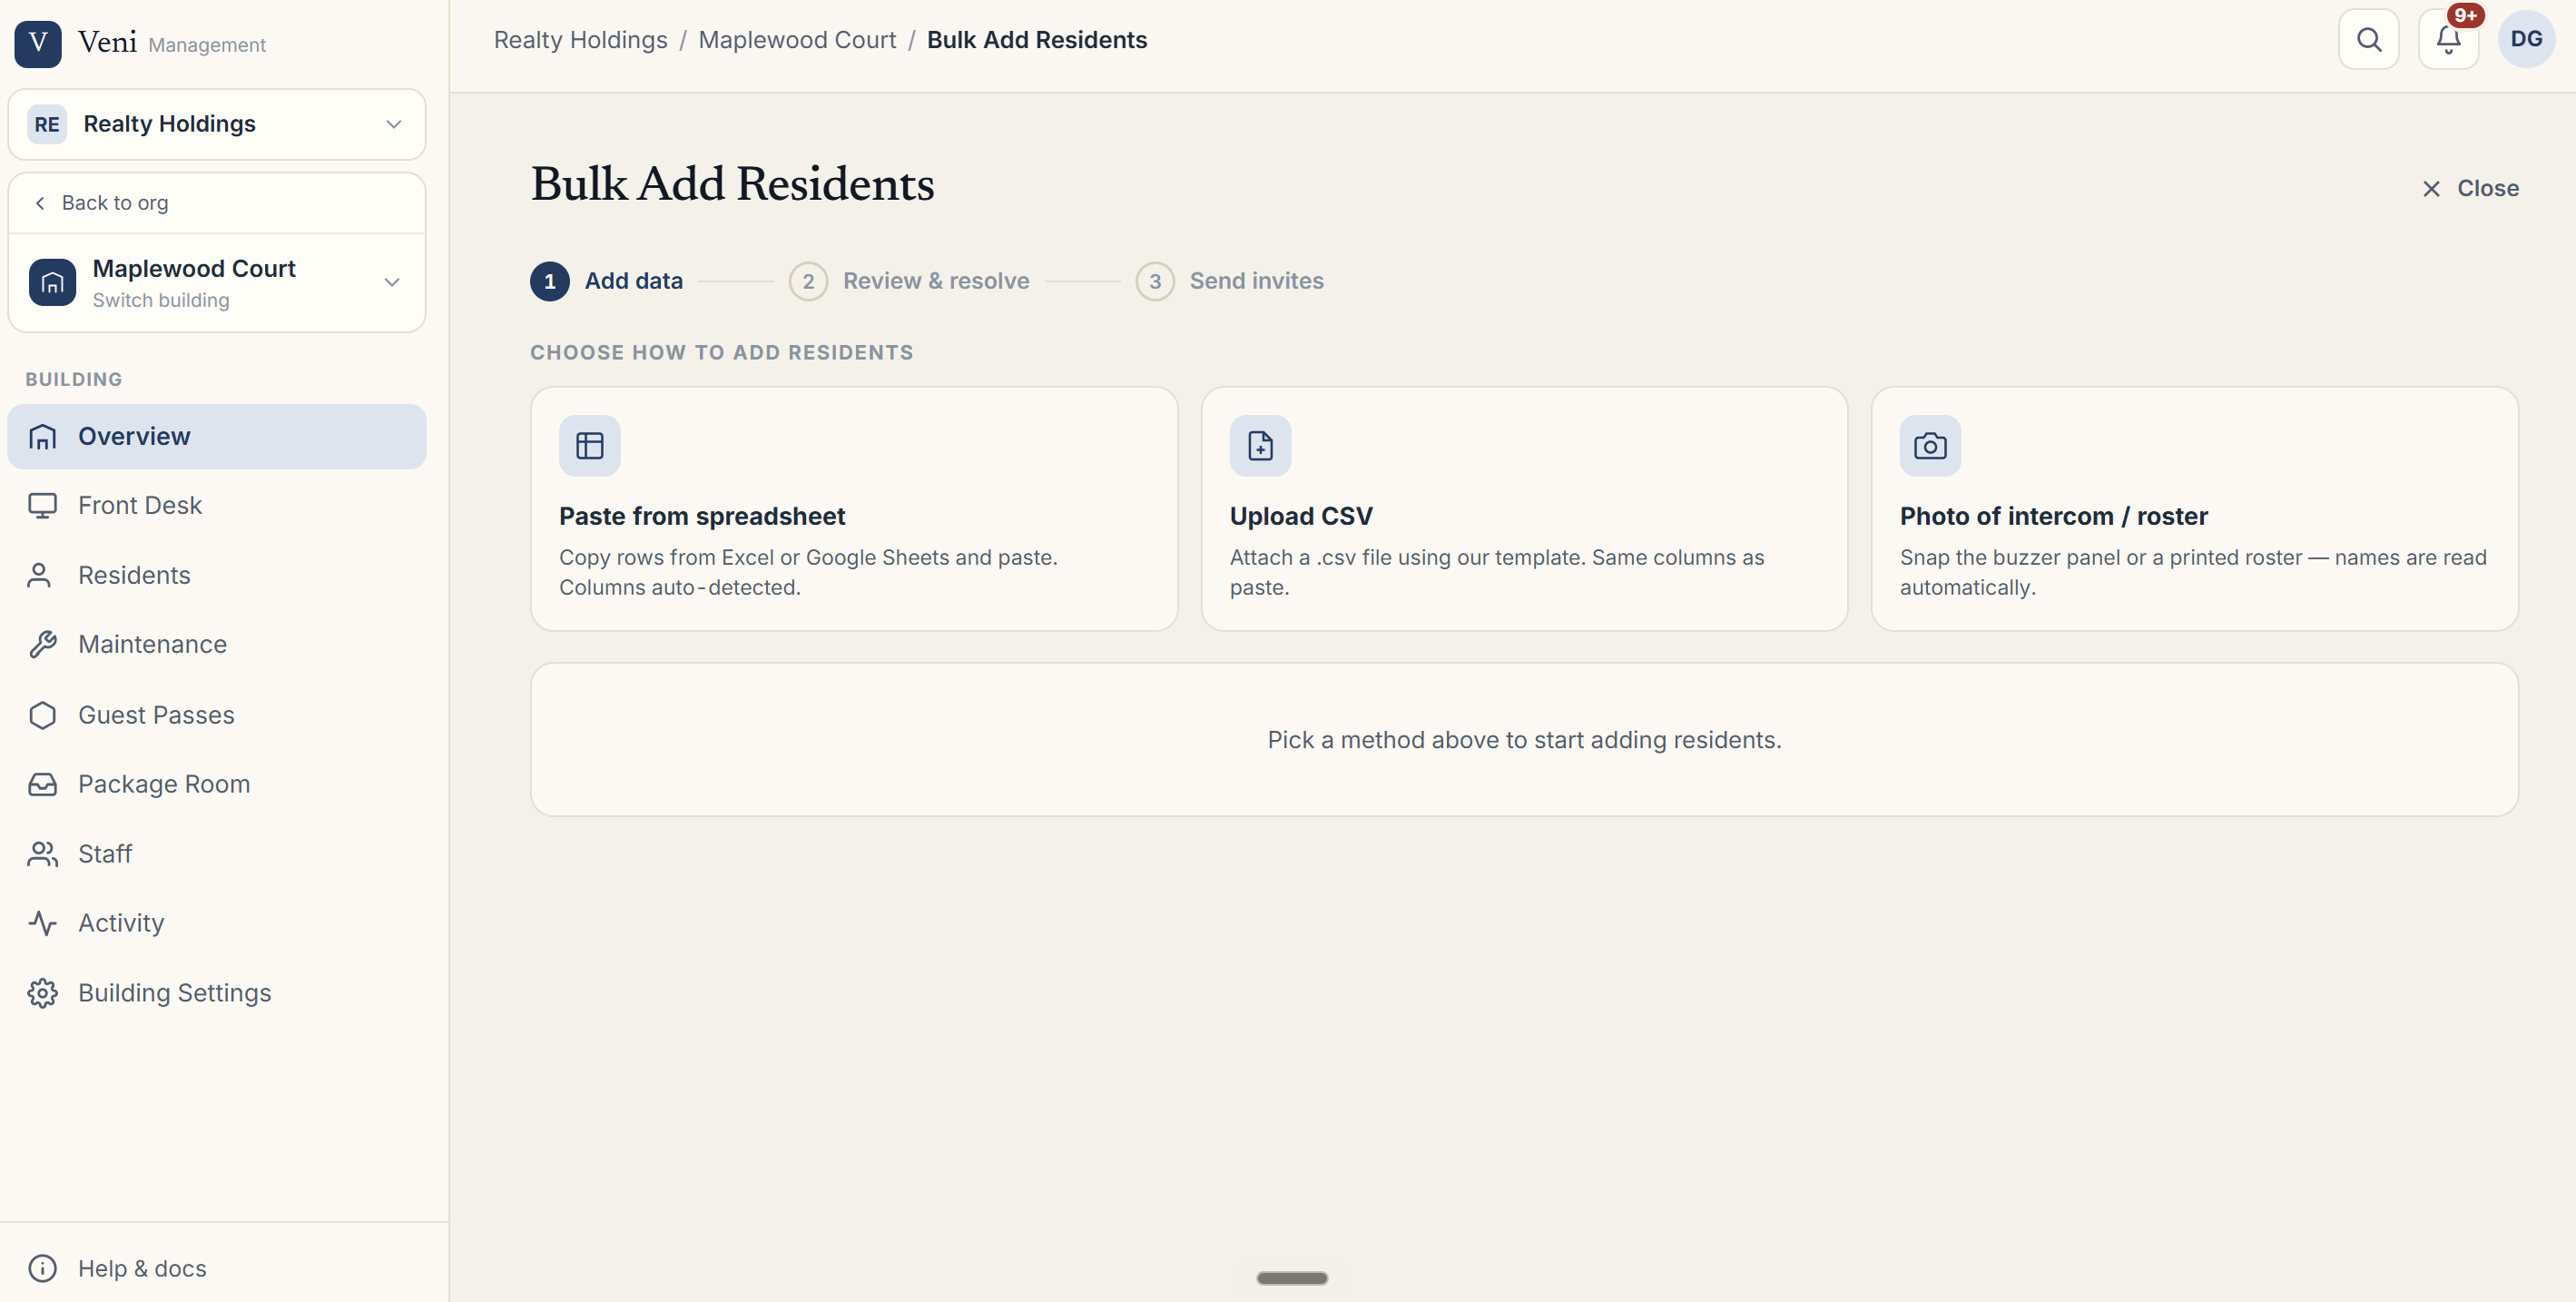 Bulk-adding residents
More in Residents
- Tracking resident app adoption1 min read
- Bulk-adding residents from a spreadsheet, CSV, or photo1 min read
- Ending, moving, and reviewing a tenancy1 min read
- Managing units and vacancies1 min read
- The resident profile and entry history2 min read