Veni is a building access control platform for property managers. This guide walks you through the first steps from a fresh account to a building where residents can open doors and guests can be let in.
1. Create your organization
When you first sign in you will be prompted to name your organization. This is the account that holds all your buildings, staff, and billing. You can switch between multiple organizations from the sidebar if you manage portfolios across different entities.
2. Add your first building
Go to Buildings in the left sidebar and choose Add building. Enter the building name and address. The building's mode (intercom only or front desk) determines which features are available:
- Intercom mode: residents receive calls from the panel and open the door from their phone.
- Front desk mode: a staffed front desk, shift tracking, package room, and visitor logging are also active.
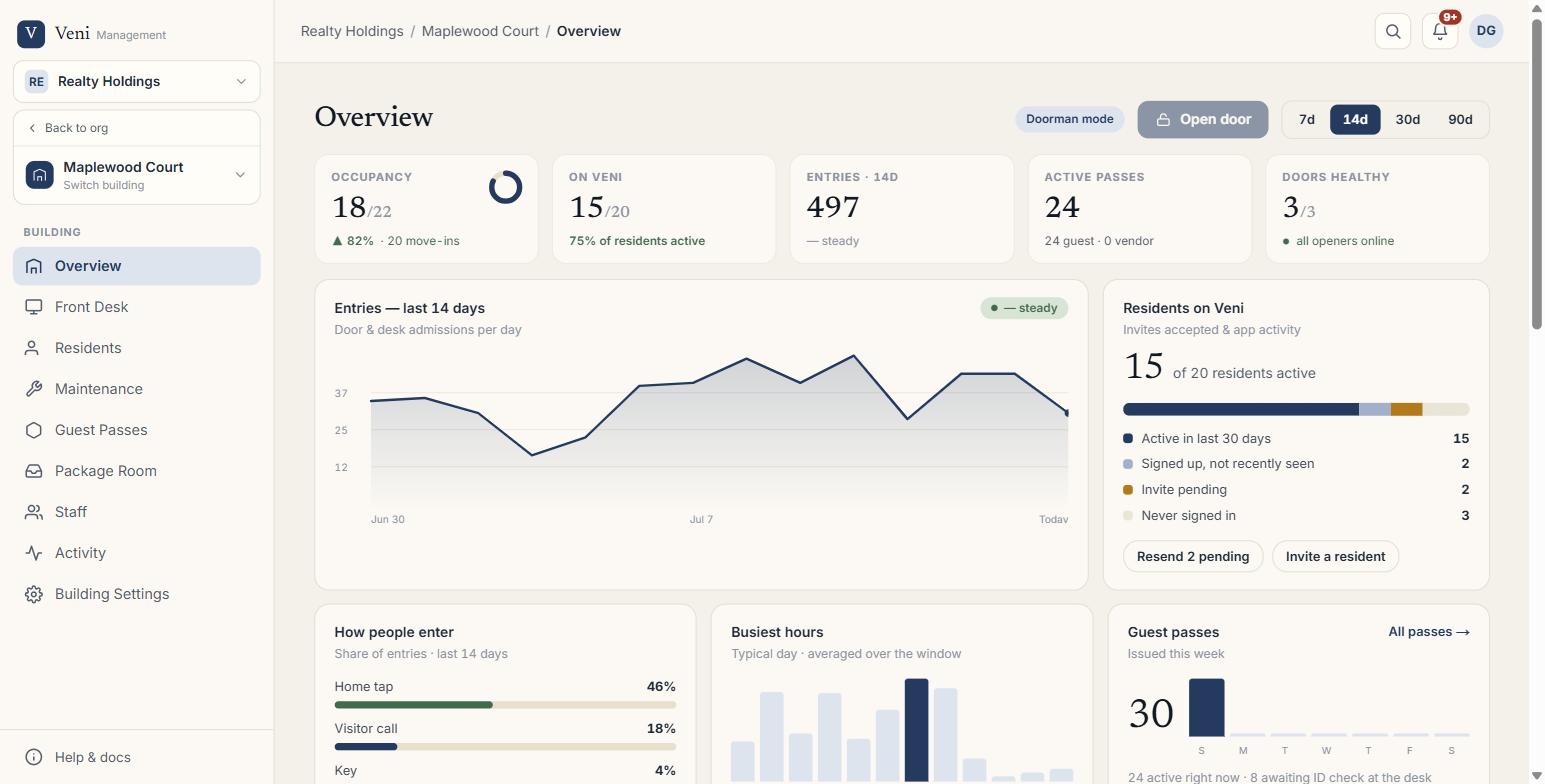 The building overview
3. Add doors and pair panels
Under the building's Doors tab, add each controllable entry point; lobby, garage, side entrance, or amenity gate. For each door with an intercom panel, pair the panel using the 6-digit code shown on its screen.
4. Invite residents
Go to the building's Residents tab and invite residents one at a time, or use Bulk Add Residents to onboard an entire move-in list from a paste, CSV, or photo of the buzzer panel. Each resident gets an email or SMS to download the Veni app and start opening doors.
5. Issue guest passes (optional)
Residents can issue QR passes to visitors themselves from the app. As a property manager you can also issue passes from Guest Passes; useful for contractors or recurring vendors.
From here, all day-to-day activity (calls, entries, packages, maintenance) flows through the portal and the tablet at the desk.
More in Getting started
- Adding your first building2 min read
- Inviting your team: staff, supers, and front desk3 min read
- Reading your dashboard and Daily Briefing2 min read
- Organizations, portfolios, and switching buildings1 min read
- Managing people and access2 min read